

Wheel bearings play a vital role in keeping your vehicle running smoothly. In fact, if they don’t work properly, you could be in for a very bumpy ride. While removing and replacing them can be tricky, with a little effort and know-how, you can repair worn wheel bearings. NSAR offers quality bearings.
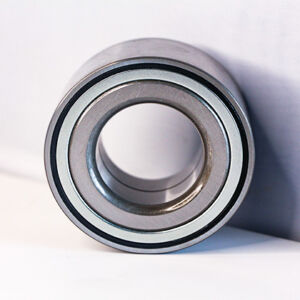
Wheel bearings are an important part of your vehicle’s suspension. Usually located in the wheel hub, rotor, or brake drum, the bearings help the wheels rotate smoothly as the vehicle moves.
The two main functions of a wheel bearing are to ensure that the wheel rolls along the road and to support the weight of the vehicle.
To determine if it’s a wheel bearing problem, try reaching under the fender and grabbing the top of the wheel. Shake it as hard as you can with all your weight.
If you feel any movement, you need a new wheel bearing. If you don’t feel any movement, jack up one corner of the car and support it with a jack stand. Try the same thing. If the wheel wobbles, the bearing is probably at the end of its life.
The wheel hub assembly is the part that holds the tire and wheel to the car. Therefore, you need to be 100% sure that the replacement is done correctly. If you are not sure if you are up to the task, leave the job to the professionals.
But if you know how to turn a wrench – and know how to do it safely – wheel hub assembly replacement is usually not too difficult.
If you do need to replace the wheel hub assembly, here are some tips to make the job easier. First, spray the wheel hub bolts with penetrating oil the night before you begin the repair. The longer the penetrant soaks in, the better the effect.
In addition, an air compressor and a heavy-duty air wrench can also help with the job. An air hammer with a socket adapter can also be used to loosen hard-to-tighten wheel hub bolts.
But the best advice is to be prepared for a challenge – especially if you live in an area with high levels of road salt in the winter. While wheel hub assembly replacement is simple in theory, years of accumulated rust and corrosion can make the job very difficult.
1.Park your vehicle on a flat surface
As with most types of automotive repairs, you need to take all necessary precautions to ensure your safety when replacing wheel bearings. The worst thing that can happen when replacing wheel bearings is for your vehicle to move or roll suddenly. Before you begin, park your vehicle on a flat surface. Put your vehicle in Park (1st, Reverse, or Neutral for manual transmission cars) and make sure the parking brake is applied.
2.Use wheel chocks to secure the wheel you are not replacing the bearing on
For added stability, it is wise to use sturdy wheel chocks to secure the wheel in place. Obviously, you will need to use wheel chocks on wheels you are not going to modify, as the wheel you are modifying will be higher off the ground. For example, if you are repairing the front wheel bearing, you should place the wheel chock behind the rear wheel; if you are repairing the rear wheel, you should place the wheel chock behind the front wheel.
3.Loosen the nuts and lift the wheel with a jack
In order to properly access the internal components of the wheel you are replacing the bearing on, you will need to lift the wheel. Fortunately, most vehicles come with a jack. Before you lift the wheel, though, you may need to loosen the nuts slightly with a tire lever, as it will be difficult to break the initial resistance of the nuts without the ground firmly supporting the wheel. After that, carefully lift the wheel. If your car does not have a jack, you may need to purchase a suitable jack at an auto supply store.
4.Unscrew the nuts and remove the wheel
The nuts should have loosened and should be easy to remove. Remove the nuts and place them in a safe place where they will not be lost. Next, remove the wheel itself. It should come off freely. Some people like to keep track of the nut by taking off the hubcap, flipping it over and using it as a sort of “dish” to hold the nut.
5. Remove the brake caliper
Use a socket and ratchet to remove the caliper bolts. Then use a screwdriver to remove the caliper itself.
When removing the caliper, be careful not to let it hang freely, as this could damage the brake hose. Instead, hook it to a fixed part of the chassis or use a short piece of rope to tie it in place. Bungee cord or bent wire hooks are two other ways to secure the caliper.
6.Remove the dust cover, cotter pin, and castle nut
There should be a small metal or plastic cover in the center of the exposed rotor on your vehicle, called a dust cover, that protects the parts that hold the rotor in place. Since you need to remove the rotor, you must remove the cover and the parts it protects. Usually, the dust cover can be removed by clamping it with the caliper and then tapping the caliper with a hammer. Inside, you will find the castle nut, which is usually secured with a cotter pin. Remove the cotter pin with pliers or wire cutters, then unscrew the castle nut and remove it (and its washer).
7.Remove the rotor
Place your thumb firmly on the nail in the middle of the rotor assembly. Use the palm of your other hand to tap firmly (but gently) on the rotor itself. The outer bearing of the wheel should come loose or fall off. Remove the outer bearing. Finally, remove the rotor itself.
If the rotor is stuck, you can use a rubber mallet to knock it loose. But this may damage the rotor, so it’s best to use a mallet only if you don’t plan to reuse the same rotor.
8.Unscrew the hub bolts and remove the old hub
The hub bearings are located inside the hub and are usually secured with several bolts that are threaded in from the back. These bolts can be difficult to reach because they are hidden in the chassis, so you may need to use a thin socket wrench and/or a breaker bar to loosen and remove them. Once the bolts are removed, remove the hub from the axle.
9.Remove the hub assembly
To access the bearings, you need to disassemble the hub. You may need to use a wrench (and/or hammer) to remove the end of the hub and any anti-lock brake wheels that may be on the hub. You may then need to use a specialized “puller” tool to remove the center bolt. The bearing assembly should come apart easily.
10.Remove the raceway and clean the knuckle
Removing the raceway of a bearing assembly usually means physically breaking it up with a grinder or hammer and chisel. So you need to have a replacement raceway ready. After removing the raceway, it’s a good idea to clean the inside of the bearing assembly around the knuckle.
TIPS: There’s usually a lot of grease and dirt here, so have plenty of rags ready.
11.Install the new raceway and new hub bearing
Install the new raceway into the bearing assembly with a few taps with a hammer. Finally, grease the new inner bearing and install it into the assembly. Make sure the bearing is properly aligned, pushed in as far as it will go, and that all seals are flush with the outside of the assembly.
12.Replace all parts in reverse order
After replacing the bearings, basically all that’s left to do is reassemble the wheel. But don’t forget that this means installing a new outer bearing once the rotor is in place. Reassemble the hub assembly and install it on the axle. Reinstall the rotor and bolt it in place. Install a new, well-greased outer bearing at this point. Gently tighten the castle nut and secure it in place with a new cotter pin. Replace the dust cap. Put the caliper and pads back in place and secure them with the appropriate bolts. Finally, put the tire back in place and secure it with the nut.

Copyright © NSAR Bearings. All rights reserved. Privacy Policy