Wheel bearings play a vital role in keeping your vehicle running smoothly. In fact, if they don't work properly, you could be in for a very bumpy ride. While removing and replacing them can be tricky, with a little effort and know-how, you can repair worn wheel bearings.
NSAR ofrece rodamientos de calidad.
¿Qué son los rodamientos de cubo de rueda?
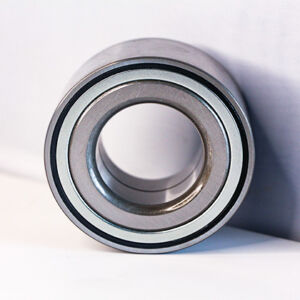
Wheel bearings are an important part of your vehicle's suspension. Usually located in the wheel hub, rotor, or brake drum, the bearings help the wheels rotate smoothly as the vehicle moves.
The two main functions of a wheel bearing are to ensure that the wheel rolls along the road and to support the weight of the vehicle.
How to Determine If It's a Wheel Bearing
To determine if it's a wheel bearing problem, try reaching under the fender and grabbing the top of the wheel. Shake it as hard as you can with all your weight.
If you feel any movement, you need a new wheel bearing. If you don't feel any movement, jack up one corner of the car and support it with a jack stand. Try the same thing. If the wheel wobbles, the bearing is probably at the end of its life.
The wheel hub assembly is the part that holds the tire and wheel to the car. Therefore, you need to be 100% sure that the replacement is done correctly. If you are not sure if you are up to the task, leave the job to the professionals.
But if you know how to turn a wrench - and know how to do it safely -
conjunto de cubo de rueda el reemplazo no suele ser demasiado difícil.
Consejos de reemplazo
If you do need to replace the wheel hub assembly, here are some tips to make the job easier. First, spray the wheel hub bolts with penetrating oil the night before you begin the repair. The longer the penetrant soaks in, the better the effect.
In addition, an air compressor and a heavy-duty air wrench can also help with the job. An air hammer with a socket adapter can also be used to loosen hard-to-tighten wheel hub bolts.
But the best advice is to be prepared for a challenge - especially if you live in an area with high levels of road salt in the winter. While wheel hub assembly replacement is simple in theory, years of accumulated rust and corrosion can make the job very difficult.
Comience a reemplazar los cojinetes del cubo de la rueda
1.Estacione su vehículo en una superficie plana.
Como ocurre con la mayoría de los tipos de reparaciones de automóviles, debe tomar todas las precauciones necesarias para garantizar su seguridad al reemplazar los cojinetes de las ruedas. Lo peor que puede pasar al reemplazar los cojinetes de las ruedas es que su vehículo se mueva o ruede repentinamente. Antes de comenzar, estacione su vehículo en una superficie plana. Coloque su vehículo en estacionamiento (primera, marcha atrás o punto muerto para automóviles con transmisión manual) y asegúrese de que el freno de mano esté aplicado.
2.Utilice calzos para asegurar la rueda en la que no va a reemplazar el rodamiento.
Para mayor estabilidad, es aconsejable utilizar calzos resistentes para asegurar la rueda en su lugar. Obviamente, necesitarás utilizar calzos en las ruedas que no vayas a modificar, ya que la rueda que estás modificando estará más alta del suelo. Por ejemplo, si está reparando el cojinete de la rueda delantera, debe colocar el calzo detrás de la rueda trasera; Si está reparando la rueda trasera, debe colocar el calzo detrás de la rueda delantera.
3.Afloje las tuercas y levante la rueda con un gato.
Para acceder correctamente a los componentes internos de la rueda en la que está reemplazando el rodamiento, deberá levantar la rueda. Afortunadamente, la mayoría de los vehículos vienen con un gato. Sin embargo, antes de levantar la rueda, es posible que tengas que aflojar ligeramente las tuercas con una palanca para llantas, ya que será difícil romper la resistencia inicial de las tuercas sin que el suelo soporte firmemente la rueda. Después de eso, levante con cuidado la rueda. Si su automóvil no tiene gato, es posible que deba comprar uno adecuado en una tienda de suministros para automóviles.
4.Desatornille las tuercas y retire la rueda.
The nuts should have loosened and should be easy to remove. Remove the nuts and place them in a safe place where they will not be lost. Next, remove the wheel itself. It should come off freely. Some people like to keep track of the nut by taking off the hubcap, flipping it over and using it as a sort of "dish" to hold the nut.
5. Retire la pinza de freno.
Use a socket and ratchet to remove the caliper bolts. Then use a screwdriver to remove the caliper itself.
When removing the caliper, be careful not to let it hang freely, as this could damage the brake hose. Instead, hook it to a fixed part of the chassis or use a short piece of rope to tie it in place. Bungee cord or bent wire hooks are two other ways to secure the caliper.
6.Retire la cubierta antipolvo, la chaveta y la tuerca almenada.
Debe haber una pequeña cubierta de metal o plástico en el centro del rotor expuesto de su vehículo, llamada cubierta antipolvo, que protege las piezas que sujetan el rotor en su lugar. Como necesitas quitar el rotor, debes quitar la cubierta y las partes que protege. Por lo general, la cubierta antipolvo se puede quitar sujetándola con la pinza y luego golpeándola con un martillo. En el interior encontrará la tuerca almenada, que normalmente se fija con una chaveta. Retire la chaveta con unos alicates o un cortaalambres, luego desenrosque la tuerca almenada y retírela (y su arandela).
7.Retire el rotor
Place your thumb firmly on the nail in the middle of the rotor assembly. Use the palm of your other hand to tap firmly (but gently) on the rotor itself. The outer bearing of the wheel should come loose or fall off. Remove the outer bearing. Finally, remove the rotor itself.
If the rotor is stuck, you can use a rubber mallet to knock it loose. But this may damage the rotor, so it's best to use a mallet only if you don't plan to reuse the same rotor.
8.Desatornille los pernos del cubo y retire el cubo viejo.
Los cojinetes del cubo están ubicados dentro del cubo y generalmente están asegurados con varios pernos que se enroscan desde la parte posterior. Estos pernos pueden ser difíciles de alcanzar porque están ocultos en el chasis, por lo que es posible que necesites usar una llave de tubo delgada y/o una barra rompedora para aflojarlos y quitarlos. Una vez que se quitan los pernos, retire el cubo del eje.
9.Retire el conjunto del cubo.
To access the bearings, you need to disassemble the hub. You may need to use a wrench (and/or hammer) to remove the end of the hub and any anti-lock brake wheels that may be on the hub. You may then need to use a specialized "puller" tool to remove the center bolt. The bearing assembly should come apart easily.
10.Retire la pista de rodadura y limpie la articulación.
Removing the raceway of a bearing assembly usually means physically breaking it up with a grinder or hammer and chisel. So you need to have a replacement raceway ready. After removing the raceway, it's a good idea to clean the inside of the bearing assembly around the knuckle.
CONSEJOS: There's usually a lot of grease and dirt here, so have plenty of rags ready.
11.Instale la nueva pista de rodadura y el nuevo cojinete de maza.
Instale la nueva pista de rodadura en el
conjunto de rodamientos con unos cuantos golpecitos con un martillo. Finalmente, engrase el nuevo cojinete interior e instálelo en el conjunto. Asegúrese de que el cojinete esté correctamente alineado, empujado hacia adentro lo más que pueda y que todos los sellos estén al ras con el exterior del conjunto.
12.Reemplace todas las piezas en orden inverso.
After replacing the bearings, basically all that's left to do is reassemble the wheel. But don't forget that this means installing a new outer bearing once the rotor is in place. Reassemble the hub assembly and install it on the axle. Reinstall the rotor and bolt it in place. Install a new, well-greased outer bearing at this point. Gently tighten the castle nut and secure it in place with a new cotter pin. Replace the dust cap. Put the caliper and pads back in place and secure them with the appropriate bolts. Finally, put the tire back in place and secure it with the nut.


