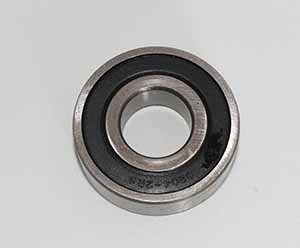
How to measure ball bearings
NSAR group company and have our own factories overseas
NSAR bearings management team of managers, engineers, and technical staff have 15 – 25 years experience. We supply customers with bearings not only produced in our own factory, but also produced in professional bearings plants designated by NSAR brand to meet customers’ different requirements, such as pillow block bearings,we have designated a factory in northern China, which has perfect testing equipment and can develop products to customer needs very rapidly. Miniature bearings are arranged in the factory in southern China, which has enjoyed a good reputation long term in producing miniature bearings.
As a professional factory that produces professional products, with professional people doing professional things, our foreign customers have declared: “NSAR bearings have reached a domestic first-class and international brand-name quality, and NSAR bearing prices are 30-50% lower than international similar bearings.”
NSAR, as best 6300 bearings supplier, wholesale deep groove ball bearings, inlcuding wholesale 6308 bearings, wholesale 6307 bearing, 6306 bearings, wholesale 6305 bearing, 6304 bearings, 6302 bearings, 6309 bearings, 6311 bearings and deep groove ball bearings for household appliance and micro-motors supplies wholesale needs,products download.
These are just a few examples of companies in China that manufacture deep groove ball bearings. It’s important to conduct thorough research and consider factors such as product quality, reliability, and pricing when selecting a supplier.
Measuring ball bearings accurately is crucial for determining their size and specifications. Here’s a general guide on how to measure ball bearings:
1. Ball Diameter: To measure the diameter of the balls within the bearing, use a micrometer or caliper to measure the diameter of one of the balls. Be sure to measure several balls to ensure accuracy, as they may vary slightly in size.
2. Diameter Measurement: The most common way to measure a ball bearing is by its outer diameter (OD), inner diameter (ID), and width (W). You can use a digital caliper or micrometer to measure these dimensions. For the outer diameter, place the caliper jaws or micrometer anvils on opposite sides of the bearing’s outer edge and record the measurement. Repeat the process for the inner diameter and width.
3. Ball Count: Count the number of balls within the bearing. This information is critical for identifying the bearing type and size accurately.
4. Pitch Diameter: In some cases, you may need to measure the pitch diameter of the bearing, which is the diameter of the imaginary circle that intersects the center of the balls. This measurement is essential for determining the bearing’s accuracy and performance.
5. Seal or Shield Dimensions: If the bearing has seals or shields, measure their dimensions, including outer diameter, inner diameter, and thickness.
6. Bearing Type: Determine the type of bearing you have, such as deep groove, angular contact, or thrust bearing. Each type may require specific measurements and considerations.
7. Special Features: If the bearing has any special features or modifications, such as flanges, snap rings, or extended inner rings, measure these dimensions as well.
8. Tolerance and Precision: Note the tolerance and precision class of the bearing, which indicates its manufacturing accuracy and performance characteristics. This information is typically stamped or printed on the bearing itself.
9. Radial Clearance: Radial clearance, also known as internal clearance, is the amount of internal space between the rolling elements and the inner and outer raceways of the bearing. Measure this clearance using specialized instruments designed for bearing inspection, such as a bearing clearance gauge.
10. Axial Clearance: If applicable, measure the axial clearance of the bearing. This refers to the amount of axial movement or play allowed between the inner and outer rings of the bearing. Use a dial indicator or feeler gauge to measure the clearance accurately.
11. Bearing Identification: Record any identifying marks or numbers stamped or etched onto the bearing. These markings typically include manufacturer part numbers, batch codes, or serial numbers, which can help identify the bearing’s specifications and origin.
12. Material and Coating: Note the material composition of the bearing components, such as the inner and outer rings, balls, and cage. Additionally, check if the bearing has any coatings or surface treatments for corrosion resistance or improved performance.
13. Documentation: Document all measurements and observations in detail, including date, location, and any relevant notes or observations. This information is valuable for inventory management, maintenance planning, and troubleshooting purposes.
14. Consultation: If you encounter any difficulties or uncertainties during the measurement process, don’t hesitate to consult with bearing experts or refer to technical resources, such as bearing catalogs, standards, or manufacturer documentation, for guidance and clarification.
15. Condition Inspection: While measuring the bearing, inspect its overall condition for signs of wear, damage, or contamination. Look for indications of pitting, corrosion, excessive wear, or abnormal noise during rotation, as these factors can affect the bearing’s performance and lifespan.
By following these steps and guidelines, you can accurately measure ball bearings and gather essential information about their specifications, condition, and performance characteristics. This knowledge is vital for selecting, installing, and maintaining bearings effectively in various industrial applications.

