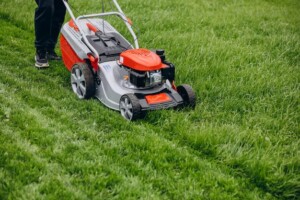
Wheel bearings are the unsung heroes of a smooth-running lawn mower. They allow the wheels to spin freely, reducing friction and ensuring efficient movement. Over time, bearings wear out from dirt, moisture and general wear and tear.
Is your trusty lawn mower making strange noises or feeling wobbly? It may be time to replace those worn wheel bearings.
To check your mower’s front wheel bearings for damage, listen for unusual noises such as grinding, squealing or rumbling while operating the mower.
Lift and support the mower and shake each front wheel to check for excessive play. Spin the wheels by hand to check for wobble or uneven rotation.
After use, check the wheel hubs for overheating, which could indicate bad bearings causing friction. Check for grease leaks around the wheel hubs and watch for loose steering or if the mower pulls to one side.
Perform a bounce test by pressing down on the front of the mower and then releasing, listening for any clicking or unusual movement. View our bearing products download.

Disconnect the spark plug: This prevents accidental starting while working.
Wear gloves and safety glasses: Protect your hands and eyes from debris and sharp edges.
Work on a stable surface: Choose a flat, level area to work on.
Use the right tool: Avoid using the wrong tool as this may cause damage or injury.
1) Prepare your mower:
Disconnect the spark plug and remove the gas cap to relieve pressure.
Tilt the mower, making sure the carburetor and air filter are facing up to prevent fuel or oil leaks.
If your mower has a blade brake, use it to prevent the blade from turning.
2) Remove the wheel:
Find the wheel you want to work on.
Use a socket wrench to loosen and remove the nuts or bolts that secure the wheel.
Carefully pull the wheel off the axle.
3) Access the bearing:
The bearing assembly may be secured by a retaining clip, dust cover, or washer. Use pliers or a screwdriver to remove these parts.
Some mowers have sealed bearings that cannot be repaired. If this is the case, you will need to replace the entire wheel assembly.
4) Remove the old bearing:
If the bearing is pressed into the hub, you will need to carefully tap it out using a hammer and a punch or a punch. Tap around the bearing, tapping evenly to avoid damaging the hub.
For bearings that have slipped onto the axle, gently pull it out.
5) Clean and inspect:
Clean the hub and axle thoroughly with a rag or paper towel.
Inspect the hub and axle for signs of damage or wear. If you find any cracks or bends, it is best to replace the entire wheel assembly.
6) Install the new bearing:
Apply a thin layer of grease to the new bearing.
Carefully press or slide the new bearing into place. Make sure they are fully seated and aligned correctly.
Reinstall any retaining clips, dust caps, or washers.
7) Reassemble the wheel:
Slide the wheel back onto the axle.
Tighten the nut or bolt by hand, then tighten it securely using a socket wrench.
Do not overtighten as this may damage the bearing or wheel
8) Repeat for other wheels:
Repeat this process for other wheels of the mower if needed.
9) Test the mower:
Reconnect the spark plug and refill the tank.
Start the mower and listen for any unusual noises.
Push the mower to ensure the wheel rotates freely and smoothly.
NSAR has more than 20 years of experience in bearing production, mature production lines and technicians, and bearing products are available in metric and imperial sizes. If you need brand cooperation or exclusive customization, please contact us.
Copyright © NSAR Bearings. All rights reserved. Privacy Policy